C language is a relatively early development of a programming language, so it is also a relatively mature programming language. Anyone who has studied C language knows that there are many operating environments for C language, such as Microsoft Visual C++, Microsoft Visual Studio, DEVC++, Code::Blocks, BorlandC++, WaTComC++, BorlandC++Builder, GNUDJGPPC++, Lccwin32CCompiler3.1, HighC, TurbC, gcc, C. -Free and Win-TC, MyTc, etc. This is a few people often use, because there are too many, so I will not list them here.
Although the C language can run in so many environments, the use of these software is also different. Because some software is relatively large, the CPU usage of the computer will naturally be much higher. But is it really necessary to install such "huge" software on your own computer? To be honest, there is no need for truth, because some softwares are only used in C language, and some are "overkill". Today, I will recommend several software that takes up less CPU but is also easy to debug.
First, visualc++6.0
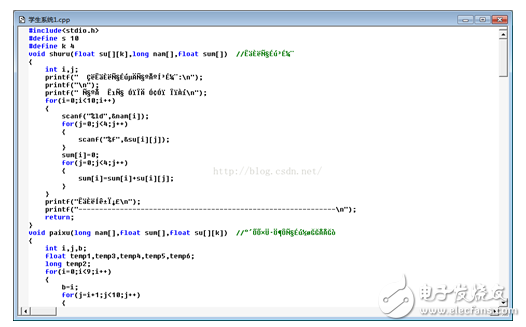
Visualc++6.0 error is more accurate, but it is more difficult to use. It is a compiler developed by Microsoft and a powerful visual software development tool.
Second, TurboC2.0
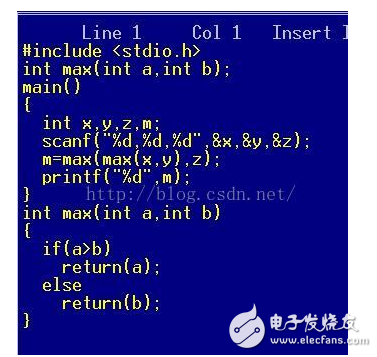
TurboC2.0 is a dos environment, it is easy to use, but does not support copying, pasting and other functions, it is not easy to use, to remember a few commonly used shortcuts.
Third, win-tc
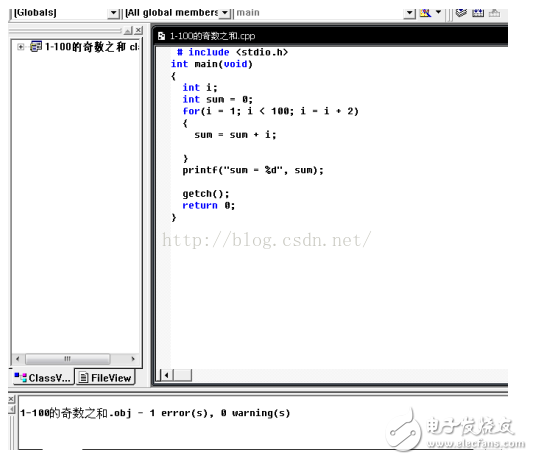
The tc under the window is easy to use, the interface is simple and beautiful. It is suitable for compiling some small programs for your own use.
The operating environment of the above three C languages ​​is relatively convenient to debug, and everyone can choose according to their own characteristics.
C language common development environmentFirst, Turbo C 2.0 development environment
Enter TC
Write a C language program that uses the integrated environment of Turbo C 2.0. Into the C language development environment, there are generally two ways: from the DOS environment to enter and from the Windows environment.
(1) From the DOS environment, click "Start" → "All Programs" → "Accessories" → "C: \ Command Prompt", type on the DOS command line:

Figure 1 DOS environment CD C:\TC↙ (specify the current directory as TC subdirectory) TC↙ (enter Turbo C environment) At this time, enter the main menu window of the TC integrated environment, the screen display is shown in Figure 2.
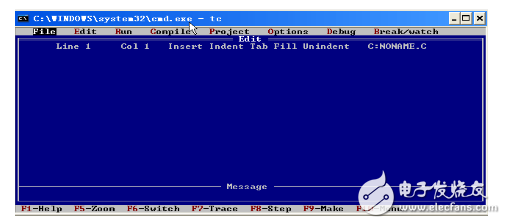
Figure 2 Main menu window of the Turbo C integrated environment
(2) Entering from the Windows environment
In the Windows XP environment, if Turbo C is already installed in the machine, you can create a shortcut on the desktop. Double-click the shortcut icon to enter the C language development environment. Or find "Run" from the "Start" menu, type "C:\TC\TC" in the run dialog box, and press the "OK" button.
Note: The above two methods have a common premise, that is, the installation path of Turbo C is C:\TC. If the installation path of Turbo C in your computer is different, you can change the corresponding path in the above manner.
2. Write the program just
When entering the TC environment, the optical tape is overlaid on “Fileâ€. The entire screen consists of four parts: the main menu, the editing window, the information window, and the function prompt line (or quick reference line).
(1) Set the written C language program output environment 1) Press ALT and O at the same time, select “Directoriesâ€, the interface shown in Figure 3 appears.
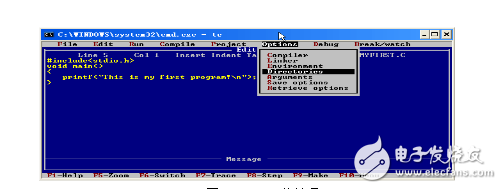
Figure 3 Options menu item
2) Press the Enter key, select “Output directoryâ€, press the Enter key, and enter “d:\program†(D drive must have a program directory, you can set the C program save directory), as shown in Figure 4. Press the Enter key, then select “Save Options†under the “Options†menu item, and press the Enter key to save the configuration information. Finally press the ESC key and press the ESC key again to exit the menu.
Note: If the TC development environment you installed is not in the "C:\TC" directory, you must modify "Include directories" and "Library directories" to "d:c\include" and "d:c\". Lib" (assuming your TC installation path is d:c).
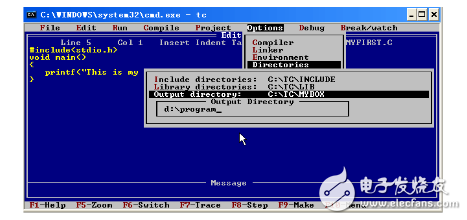
Figure 4 modify the output directory
(2) writing and compiling programs
1) Press ALT and F at the same time, the interface shown in Figure 5 appears:
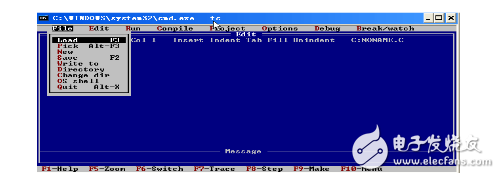
Figure 5 File File menu item
2) Move the cursor down key, navigate to “Write toâ€, press Enter, type “d:\program\myfirst.câ€, press Enter, the program you are about to type will be saved in the D disk program directory. The file name is myfirst.c.
3) Type the following source program: #include "stdio.h"
Void main() { printf("This is my first program!"); }
4) Press the F2 key to save the file directly.
5) Press ALT and C at the same time and select “Compile to OBJ D: MYFIRST .OBJâ€, as shown in Figure 6.
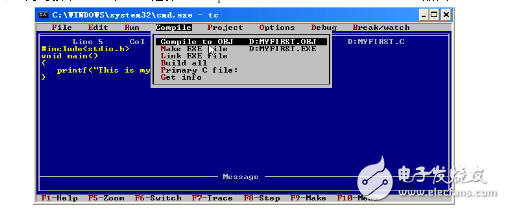
Figure 6 Compiling the MYFIRST.C program
6) Press the Enter key to display the information dialog box for successful compilation, as shown in Figure 7.
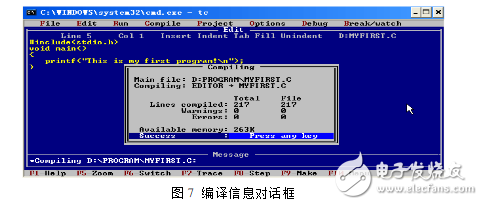
7) Press the Enter key, press ALT and C at the same time, select “Make EXE file D: MYFIRST .EXEâ€, as shown in Figure 8.
8) Press the Enter key, and the information dialog box for generating the execution file success or failure appears, as shown in Figure 9.
9) Press the Enter key, press the CTRL and F9 keys at the same time, run the program, press the ALT and F5 keys at the same time, and watch the program running result, as shown in Figure 10.
10) Press any key to return to the TC integrated development environment. Important: When you type the program, you can directly run the program by pressing the CTRL and F9 keys (for a C program file, you can save steps 5-8). If there are no errors, press the ALT and F5 keys simultaneously to watch the program run.
Second, Visual C++ 6.0 development environment
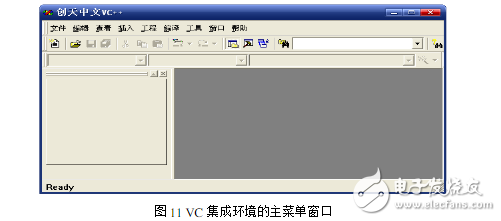
1. Enter the VC environment from "Start" → "Programs" → "Microsoft Visual Studio6.0" → "Microsoft Visual C++ 6.0", then enter the main menu window of the VC integrated environment, the screen display as shown in Figure 11.
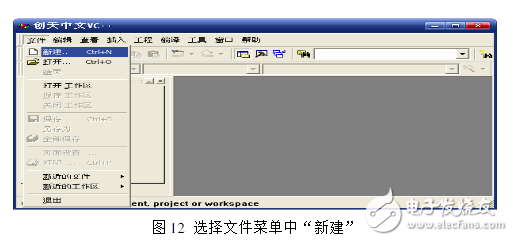
2. Edit, connect and run C program under VC environment (1) Create a new project 1) Select the "File" menu in the VC environment, and then click the "New" menu item. As shown in Figure 12
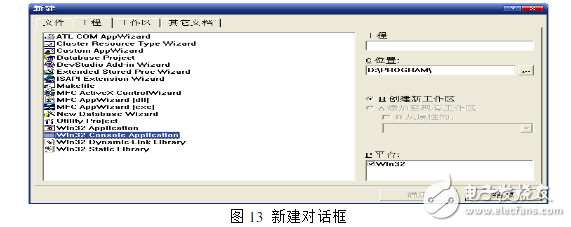
2) Set the corresponding content in the pop-up new dialog box, as shown in Figure 13. Be prepared to save the file directory in advance, such as d:\program. Select "Win32 Console Application" in the "Project" tab and enter "Example1" in the text box under "Project".
3) Click the "OK" button and the interface shown in Figure 14 appears.
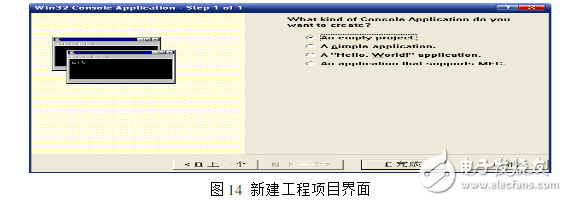
4) Click “Finishâ€, then click “OKâ€, the interface shown in Figure 15 appears.
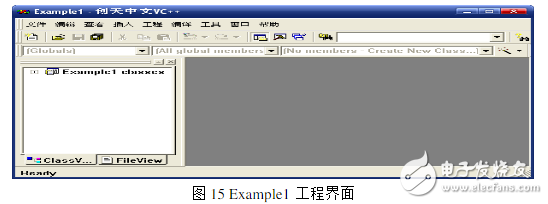
2) Add C language files to the empty project
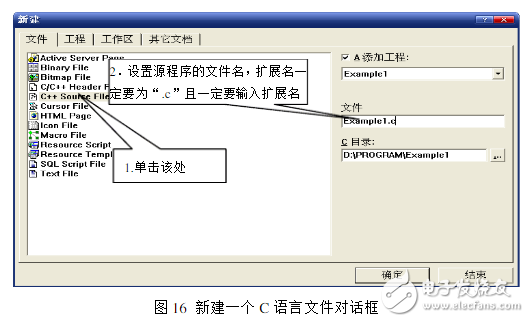
1) Select the "File" menu, then click the "New" menu item, the interface shown in Figure 16 appears. Click "C++ Source File" and enter the new C language file name in the text box under the "File" tab on the right. After setting, click “OK†to return to the VC++ editing interface. The source file Example1.c file to be input and edited is stored in the program directory of the D drive.
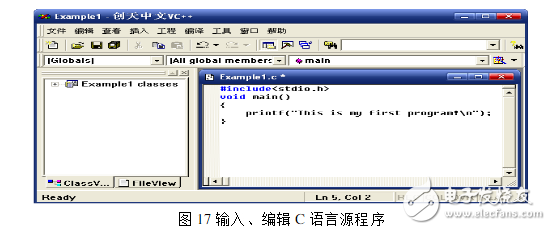
2) In the work area of ​​Figure 17, enter the source program.
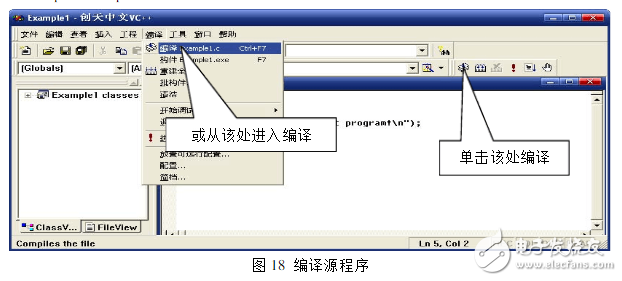
3) After entering the source program file, select "FILE" in the main menu bar and select "Save" (SAVE) from its drop-down menu. Click "Build" on the main menu, select "Compile Example1.c" (Compile Example1.c) from its drop-down menu, or click the "Compile" button on the toolbar, as shown in Figure 18.
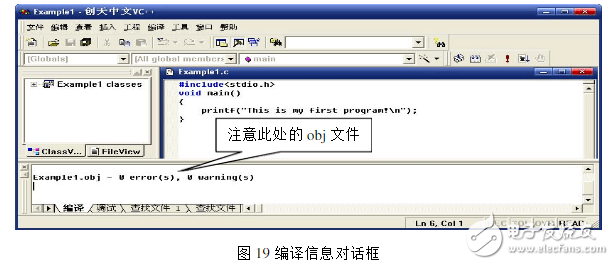
4) After compiling, it will be as shown in Figure 19. At this time, pay attention to the information in the compile window. If there is a compile error, the source program will be modified and then recompiled until there is no error.
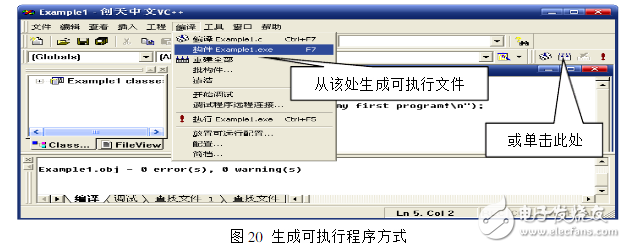
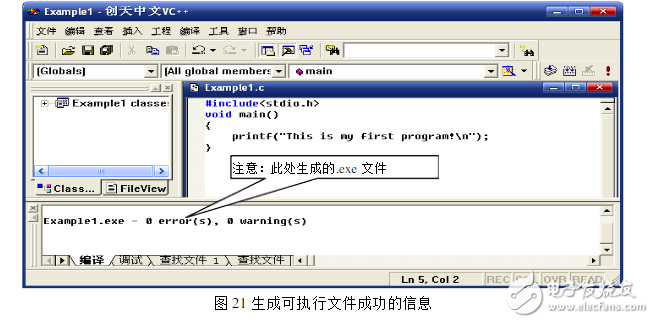
5) As shown in Figure 20, click on "Build" in the main menu, select "Build Example1.exe" (build Example1.exe) from its drop-down menu, or click the "Build" button on the toolbar. . After the connection is executed, the connection information will be displayed in the debug window, as shown in Figure 21. If there is an error in the connection, the source program will be modified, and then compiled and connected until there is no error.
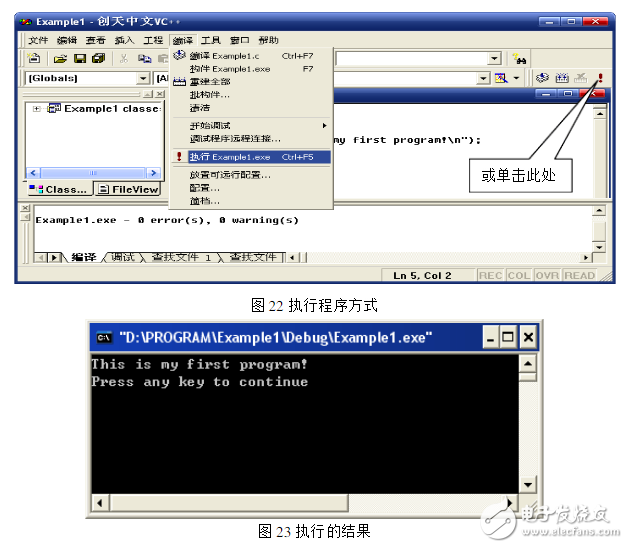
(3) After the execution program is compiled and connected, an executable program file is generated. As shown in Figure 22, click on "Build" in the main menu, select "Execute Example1.exe" from its drop-down menu, or click the "Execute" button on the toolbar. After execution, the results shown in Figure 23 will appear.
Smart Phone Holder For Car Vent
Smart Phone Holder For Car Vent,Air Vent Iphone Mount,Air Vent Phone Holder,Air Vent Cell Phone Pouch Holder
Ningbo Luke Automotive Supplies Ltd. , https://www.car-phone-holder.com