Synology NAS is powerful, and it can be used as a website server in addition to various common public clouds in addition to the well-known storage files. With DDNS and international domain names, you can achieve the same functionality as a professional web host purchased online, and even more powerful because of unlimited space and unlimited resources.
Of course, what many friends want is to hang up a blog and record their lives. No problem, Synology NAS can be easily implemented. The following tutorial will be explained by building a BLOG on the NAS as an example.
First, build the environment.
Synology is based on the LINUX system, therefore, only support php language. First of all, let's build the PHP+MYSQL environment.
Go to the "Package Center", find websration, mariaDB and phpmyadmin, and install them one by one.
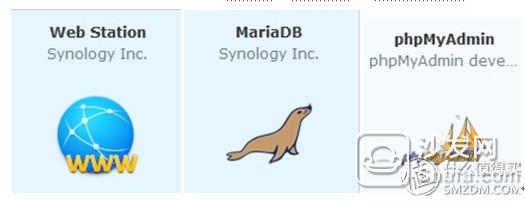
Web starion: used to configure the WEB server, binding the domain name in the future needs to be carried out here.
MariaDB: Basic program that must be installed, otherwise phpmyadmin cannot run.
Phpmyadmin: A database for managing websites. No matter which website you use, you must use a database.
OK, to this point, we have built a site environment.
Second, download the BLOG program
Synology itself has a WP blogging program suite. Can be found in the center of the kit, as shown below.
However, in this tutorial, we do not use the WP program, but use the zblog, a domestic blogging software that is more compact, more efficient, and extremely powerful. Official download address: https://.
After downloading, unzip and change the folder name to zblog.
This folder is our website program.
Third, configure the site
(A) The folder that was renamed zblog after the previous step of downloading and decompressing is copied to Synology's web folder.
Method: Log in with IE GroupShui, filestation.
Open web directory

Simply pull zblog in. Note: The entire zblog folder is pulled directly in, not just the files inside.
(b) Set the folder permissions to read and write.
Right-click the zblog folder and select Properties - Permissions. Then, set all the http entries inside to read and write.
In the beginning, all options are gray and cannot be selected. You can do this as follows.
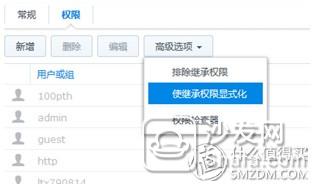
Then, double-click inside the http, like this check the write permissions (unfinished this step, the back of the blog will not be installed normally)
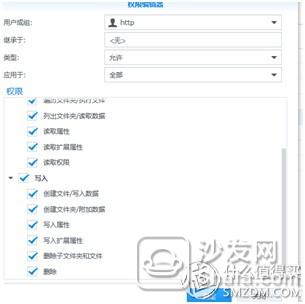
Last but not least, check this option at the bottom.

OK, now you can install the blog.
(c) Configure Website Settings
1, open the webstation, select the virtual host
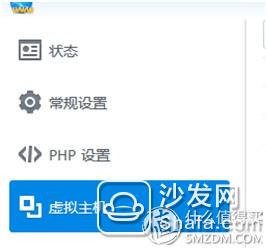
2. Click Add, and click Port Based. As shown in the figure below, you can enter an unused port number. Here we enter 89. PHP back-end server and php also selected.
At this point, our web space is already accessible. Next, start the installation.
Fourth, install the blog
The browser enters the group's IP address and port number 89, as in my: http://192.168.3.100:89/
Then follow the installation prompts.
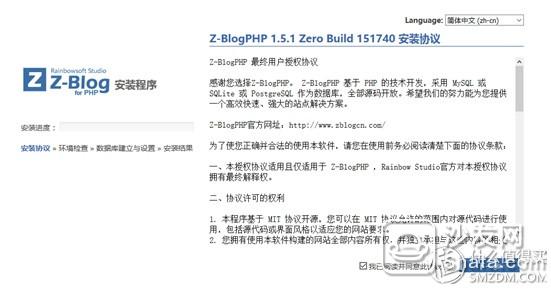

Note: If there is a red fork on this page, it is often because the above folder permissions are not set. For details, see the chapter on building environment.
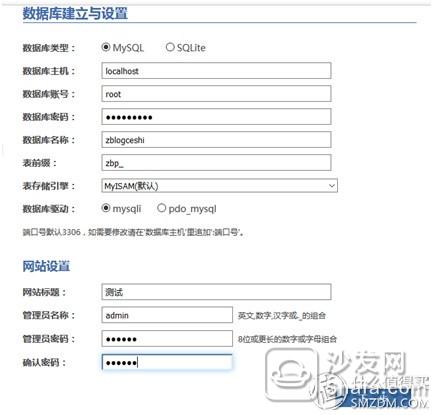
The initial user name of the database is root, and the password is empty (if you have changed before, you can enter the phpmyadmin suite to change), and the database name can be taken freely.
The site title, administrator name, and password must be entered.
Then there is an error page (as shown below), please check the database user name password is normal, and then re-examine the previous permission settings to ensure that each http item can be written.
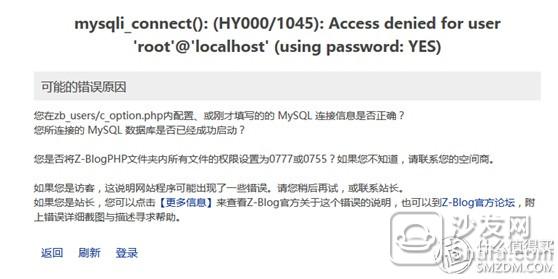
If you succeed below!

Well, try visiting our blog

OK, to this point, we can already visit our blog in the form of IP plus port number on the internal network.
As for the management of the blog, please feel free to explore it.
What we need to do next is to bind the DDNS domain name so that the domain name can be accessed without a port number. About this content, we discuss it in the next article.
The KSPOWER brand 15V Class 2 Power Supply is one constant voltage mode, provides the complete Class 2 power transformer solutions covering a output wattages ranging from 4.2 watts to 100 watts and the output current ranging from 100ma to 5000ma. The 15v led power adapter is PC materials with IP20 rated environment protection for indoor LED lightings. The 15V class 2 power adapter is Class 2 designed and offers 3 years after-sale customer service and both UL/cUL, FCC CE RoHS Listed safety certificate and compact style enclosures. The 15v led light transformer provides various connection types: desktop, wall mount, cord to cord three types, safety protections for short circuit, over load, over voltage and over temperature. The 15V Class 2 power supply units accepts various dc connector size for LED lights. If you are looking for 15V UL cUL Class 2 AC to DC power supply adapters for your LED strip signs applications, KSPOWER can help you, welcome to contact and inquiry!
switching power supply,ac adaptor 15v,class 2 power unit,ac wall adapter,plug in power supply
Shenzhenshi Zhenhuan Electronic Co., Ltd , https://www.szzhpower.com